
Many cities have recently changed laws, allowing city dwellers to keep chickens in their backyards. Though flocks usually must be kept small, are almost always exclusively hens, and have specific rules for containment, keeping chickens is a great way to provide your family with fresh eggs on a regular basis. If you are outside of the city, you likely want to keep chickens, too, whether for meat, eggs, or both.
Being a chicken tender is often one of the first steps to becoming a homesteader because chickens are easy to care for, relatively cheap, and provide food.
And, like many projects, the key is knowing where to get started.
With any animal, I recommend gathering all the supplies you will need and setting everything up before you bring home those new tiny dinosaurs. A little bit of prep saves a lot of stress for both you and them.
So, here are 10 must-have supplies for chickens:
1. Chicken Coop
Every living thing needs shelter and chickens are no different. Having the right coop for your chickens makes all the difference. It protects them from predators, storms, and extreme temperatures. It also gives them a place where they feel safe-allowing for less stress, which equals more eggs for you.
Now, when you search chicken coops online you will find everything to very simple and small to elaborate and large (and everything in between). I know those Pinterest coops with framed pictures look cute, but in a week’s time they will be covered in dust and poop just like the simple ones. Your chickens don’t care about color schemes and art work- they just want to be safe. If you want to use your interior design degree-go for it. However, if you want to stay low-budget and practical, that’s absolutely fine too.
What is important is to have enough space for each chicken. As a general rule, standard breeds require 3-4 square feet of coop space per chicken. This is before a roost and nesting boxes (which I will talk about later). If you get a larger breed, it will need more space, but most people start with standard breeds.
When our family started with chickens, my city allowed 6 chickens per household. This meant that my coop needed to be 18-24 square feet. I purchased one of those cute, but small (and expensive) coops and our girls did just fine. In fact, the smaller size allowed for better temperature control in the winter and kept them safe from wandering dogs.
However, now that we are in the country we have several different coops. We have a separate coop for our egg chickens, our meat chickens, a brooder for chicks, and a chicken tractor to transition them from baby to part of the flock. While each of these has pros and cons, we’ve found that they work far better than those store-bought coops for our larger flock.
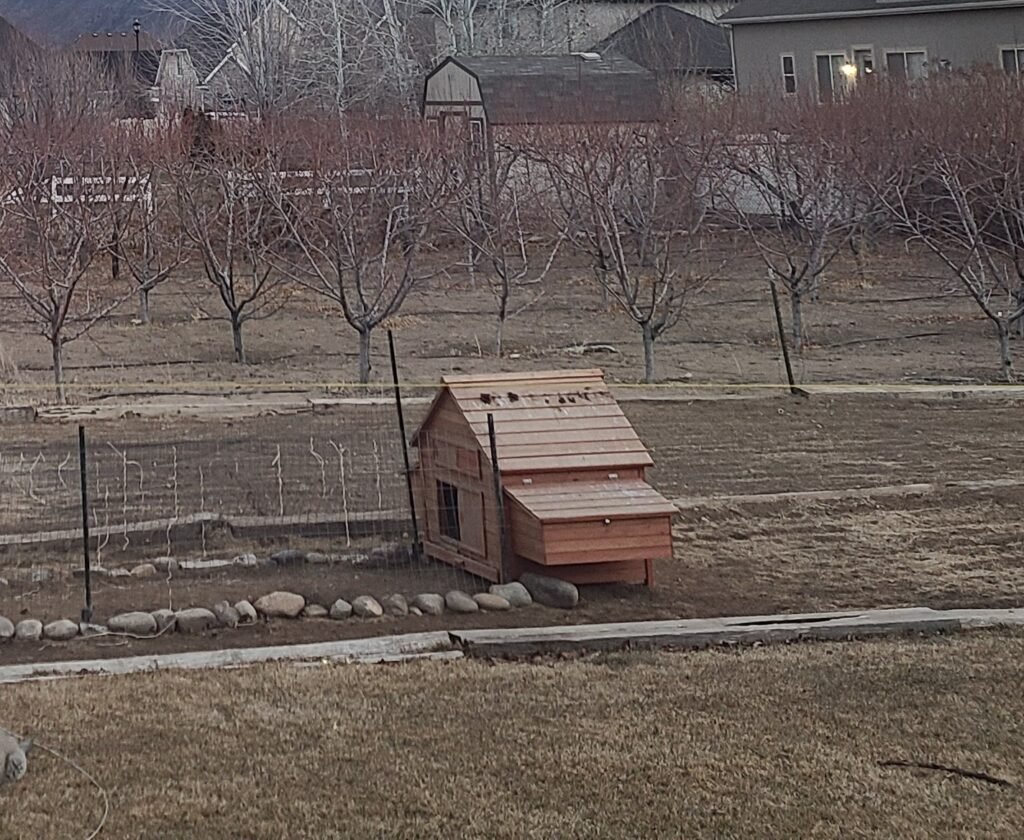
Layer Coop
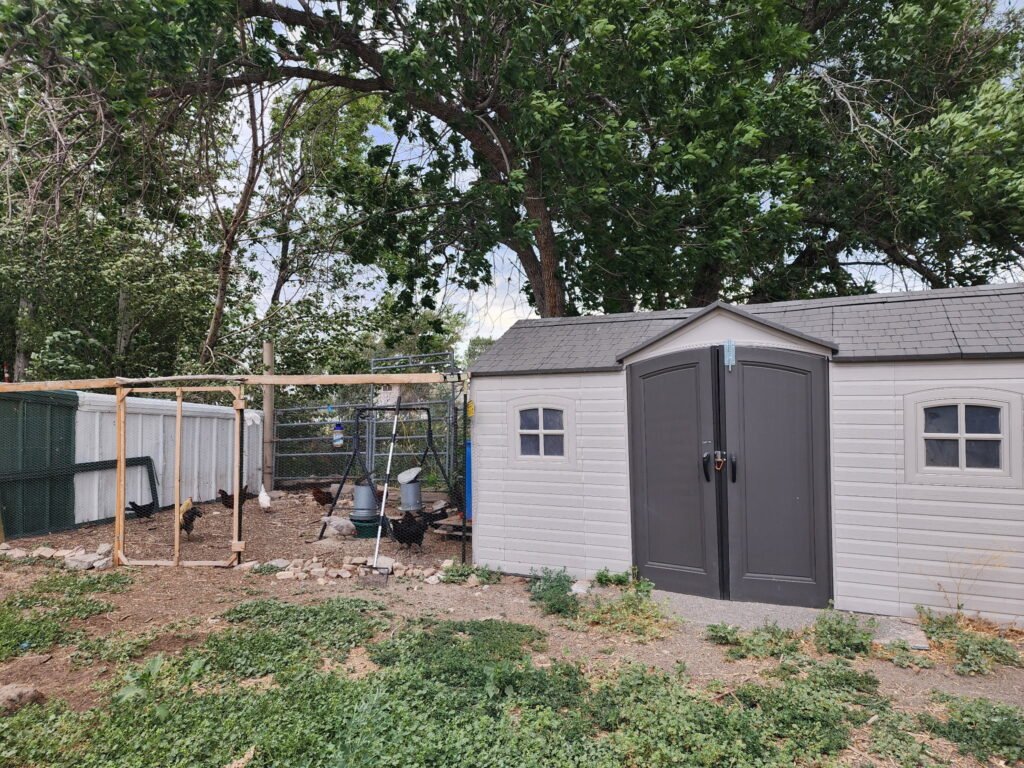
Our layer coop is, in fact, not a chicken coop at all. It’s a vinyl shed. We have over 20 layers now and they needed a lot of space. It was cheaper to buy a shed on sale than it was to purchase a large coop. This is our second shed-coop and we love the easy setup, the ability to choose different sizes, the stability in storms, and the options to add roof vents, windows, and large doors.
We set up the shed, added a roost and nesting boxes, and cut a chicken-sized door in the side so the ladies (and their roosters) can get in and out when they want. During hot days, we open the doors and allow them to roam our pasture. On cold days, they stay closed up and warm.
Meat Pen Coop
My family is new to meat chickens, and we are quickly approaching our third butcher day. We have learned a lot, but are still experimenting with what we want to do long-term.
For our first batch, we purchased Cornish crosses. Cornish grow quickly and are ready to butcher in just 8-10 weeks. However, they eat like they are starving, have a lot of health issues, and can even break bones if their body grows faster than their legs. These birds don’t roost, they sleep on the ground. They also don’t need nesting boxes because they are processed before they reach laying age. They do, however, need food to be taken away from them for parts of the day so they don’t grow too fast.
Our second batch, was also Cornish crosses. However, we decided we wanted to try something more sustainable that allowed us to breed our own meat chickens. We also wanted to avoid the health issues that come with such a fast growth period. So, at the same time, we bought 13 Delaware chickens. These chickens are a larger dual-breed, meaning they can be kept for eggs and meat. Our plan is to harvest the excess roosters, keep the girls and one rooster for breeding, and harvest the chicks when they are old enough. This means that our Delawares need roosts and nesting boxes, as well as room to grow to full size.
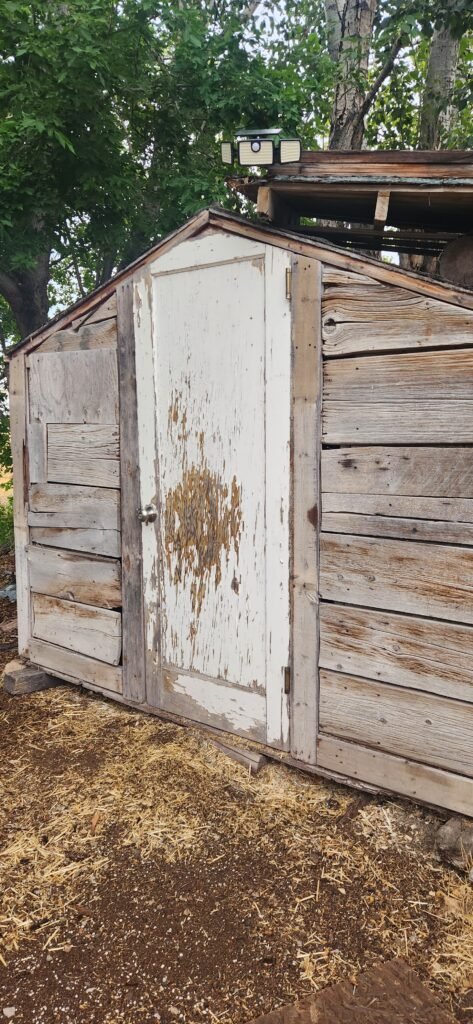
Having two different types of chickens, with different growing rates meant separating them at a few weeks old. Luckily, our new home came with its own chicken coop. And while I want to improve it, for now it works just fine. Our Delawares are happily living in a “custom-built” coop that is basically a frame of 2×4’s with some wood pieces screwed onto it. It includes a roost, run, and nesting boxes and has been great for allowing our little Delawares to grow to butcher age (next week), but also gives our girls a place to lay eggs for future processing.
Chicken Tractor
While our Delaware took over the existing coop, the Cornish needed a place to grow. For us, a chicken tractor was the answer. I simply built a square frame for the bottom out of 2×4’s, arched a cattle panel over the two sides of the frame, and added chicken wire around it. My husband built a door for the front, using scrap wood, a couple hinges, and a latch. Though it’s not large, it worked great for our Cornish, who had room to move around and did not need a roost. It allowed us to quickly remove food when needed, hang a light when they were cold, and gave them enough room to get a little bit of exercise, making the birds and the meat healthier. We added a moving blanket to the top on cold nights to keep in heat, removed it when it warmed up, and put it in a place sheltered from wind and rain (our shop).
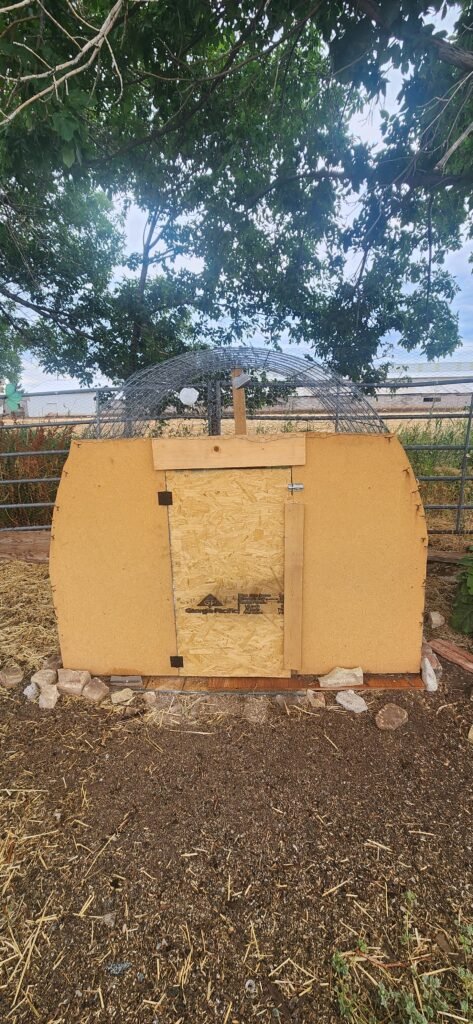
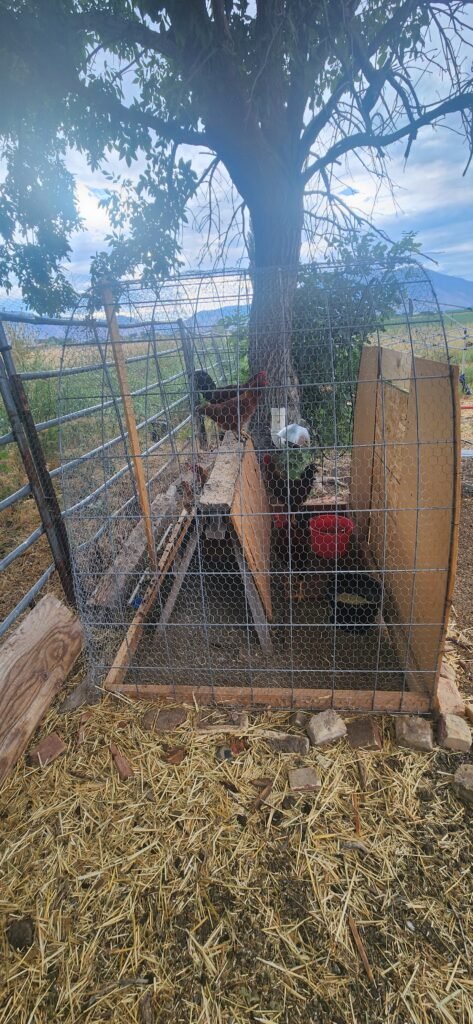
My favorite aspect of our chicken tractor is that it’s portable. We made it small enough that we could move it around as needed and it has become our multi-purpose coop. After processing day, it was cleaned and moved out next to our layer coop. It was placed under a tree, which provided shade and protection from rain. A roost (spare sawhorse) was added to the inside and our new additions to the flock were put out there. This gave us a safe spot to allow the two flocks to get to know each other. After a while, we began to let them all out into the pasture together, but kept both coops so they had separate sleeping, eating, and drinking areas. Eventually, the new chickens felt safe enough to move into the bigger, nicer layer coop and the chicken tractor could be moved away.
Brooder Box
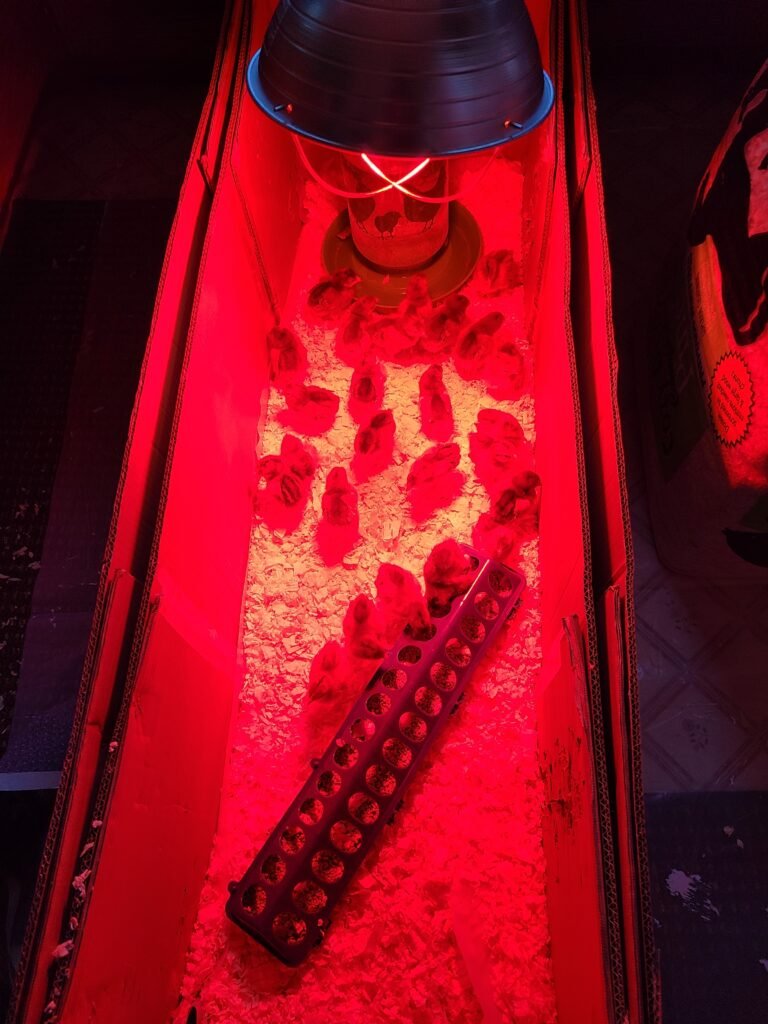
While not technically a coop, baby chicks need a brooder box for the first couple weeks of their lives. Their baby feathers and small size make them susceptible to extreme temperature changes and risk their lives. A smaller brooder box also makes it easy on new chicks by placing food and water nearby, rather than forcing them to forage. It protects them from predators and from being picked on by the rest of the flock.
For a long time, our brooder box was whatever box we had with a light, water, food, and wood shavings added to it. We’ve used Amazon boxes (add a flat trash bag or two to the bottom to keep it from getting soggy and make it easy to clean), appliance boxes, and those plastic bins that you store your Christmas decorations in. Most of the time, it ends up in our spare bathroom shower, where the cats can’t get to them.
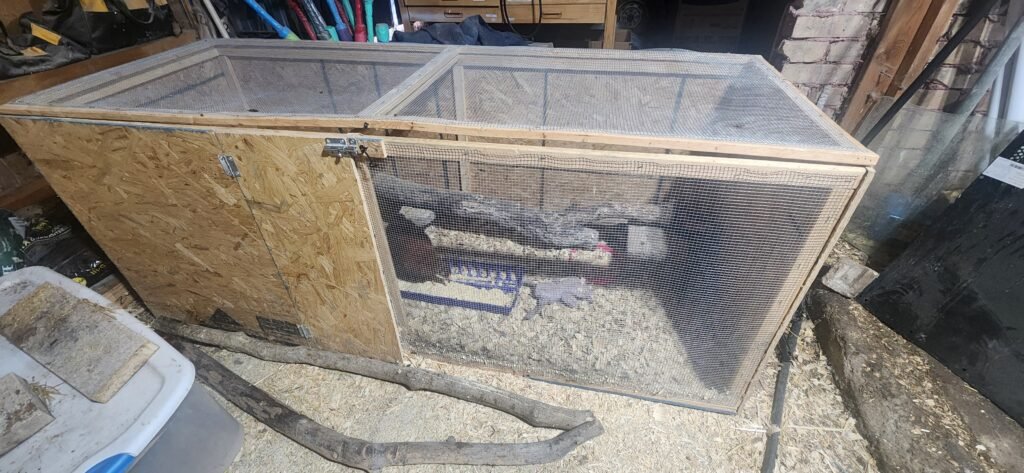
This year when I “accidentally” bought 20-ish more chickens (see chicken math), my wonderful and ever-patient husband built me a brooder box from some spare 2×4’s and plywood. It is a simple rectangle frame with a solid wood floor. On one end, the sides are plywood, giving the babies an enclosed and warm space to gather. Here we keep the food and water. On the other end, the sides and front are hardwire cloth with a plywood back, giving them a breeze and a way to look out at the world. We added a large branch, balanced on some bricks, for a small roost. The top (a frame with hardwire cloth) is on hinges and latches at the front, allowing us to easily move chickens, clean, feed, and water. In the front, my husband added an additional hinged plywood door with a latch, which is great for quick feeds or moving water without being attacked by older chicks that think they want to fly out the top. On top, we place a sawhorse, which is attached to our heat lamp. This set-up allows us to move the lamp up or down to adjust temperature and ensure that it won’t fall in on our chicks, as the hardwire cloth stops it if it does fall. Chicks generally can leave the brooder when all their adult feathers have come in and they can regulate their temperature well.
2. Run
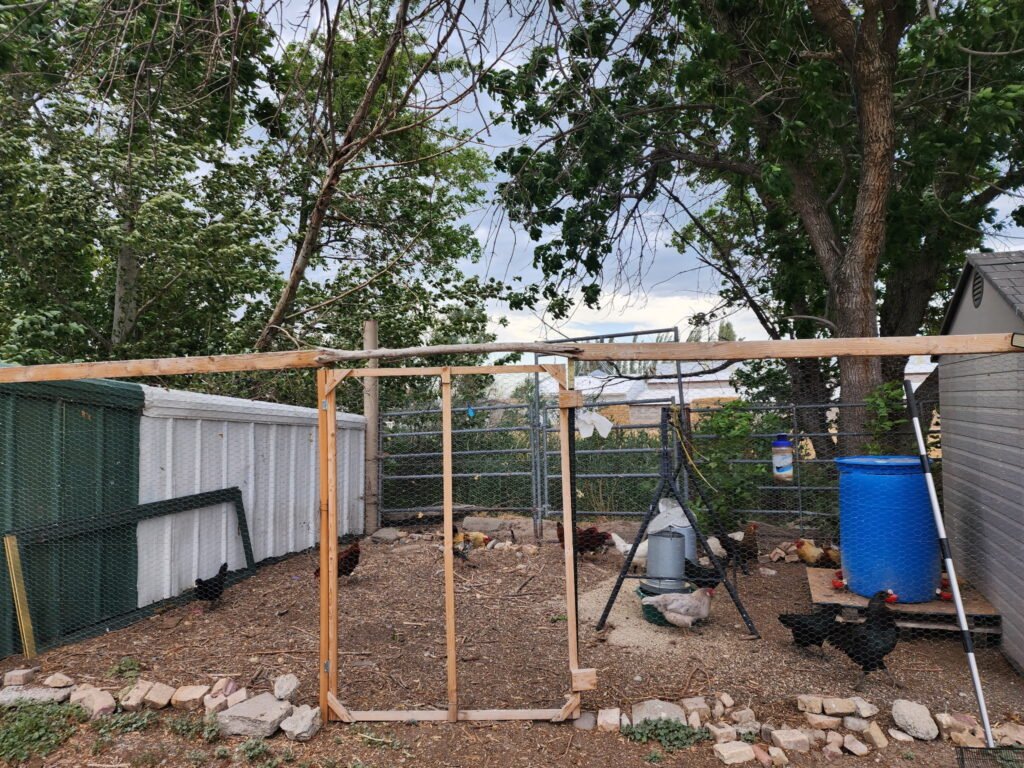
Something that I see most city chicken tenders get wrong, is the run. Many people figure- they have a coop, why do they need anything more. However, chickens are natural foragers and need space to exercise, explore, and not be bored in their house. Chickens love to look for bugs, seeds, and plants to eat, and a varied diet helps eggs be more nutritious and tastier. Besides, why would you not use these natural pest-control experts to protect your house?
A run can be as simple or complicated as you want. It is basically a fenced-in area where your chickens can roam. Many people use a side yard or backyard. Others dedicate a specific space near the coop and fence it in.
At our house, we’ve done a mixture of both. Our layers and our meat pens have a framed and fenced-in run. Our layer run is just T-posts with chicken wire across it. One side of the run is our chicken coop wall and this is where they access the coop with their little door. The other side is our pig pen wall. Our run has a gate in the front. In good weather, the run and coop doors are opened and they are allowed into our fenced pasture. This gives them extra space and enrichment, and helps us with bug control. In bad weather, or when there are predators nearby, they are kept in the closed run.
Our meat chickens are kept closed up all the time. Their coop has a small door cut out which accesses the run. The run is an old wire gazebo covered in chicken wire. Eventually, I want to add a door to the run, as it’s difficult to crawl through the chicken-sized door to clean it. For now, though, they have room to roam, and we throw in bugs, scratch, and other treats to aid in enrichment.
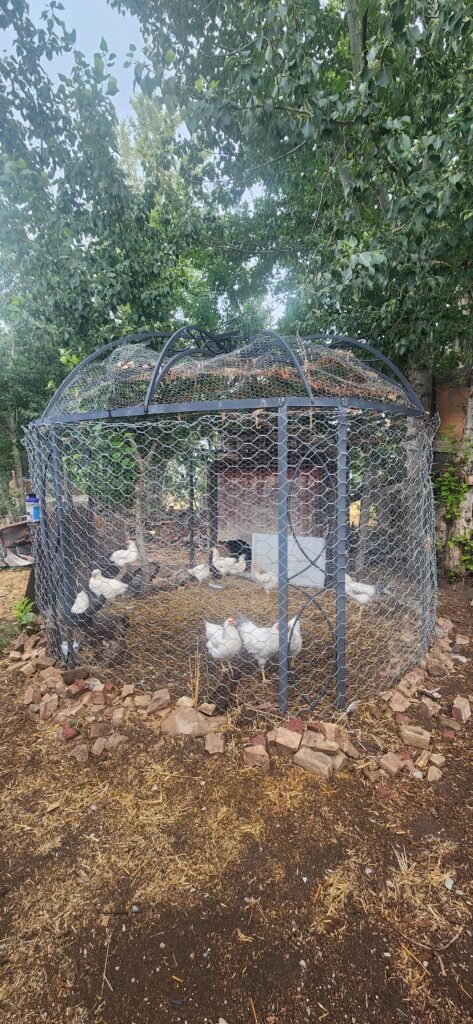
No matter what you decide to do for your run, each chicken needs 10-20 square feet of outdoor space. A run should be predator-proofed (see #3) and give your chickens a playground where they are allowed to explore, scratch the ground, run and stretch out. Chickens that don’t have enough space or who are locked in a coop with nothing to do are far less healthy, may start to fight, and can turn unfriendly. If you like, you can add large rocks, sticks, treats, or chicken-safe items that mimic a more natural environment and give them things to perch on, dig for, or learn about.
3. Predator proofing
Any area your chickens can access should be predator proofed. Hawks, racoons, skunks, dogs, mink, and snakes will harm eggs and chickens if given the chance. Hawks can fly, racoons are smart, mink can climb, and snakes can fit into tiny spaces so you need to predator proof every angle.
Starting at the bottom, your coop and run should be dig-proof. In our coop, we simply left a skirt of chicken wire about 6 inches long bent on the ground when we hung our sides. Then, we added bricks and rocks (that we pulled out of the pasture) to keep predators out. We placed a 6-inch wide piece of hardwire cloth below our run gate. Since our coop is a shed, it has a floor and cannot be accessed by digging. Our meat coop, chicken tractor, and brooder all have plywood floors to prevent digging by predators.
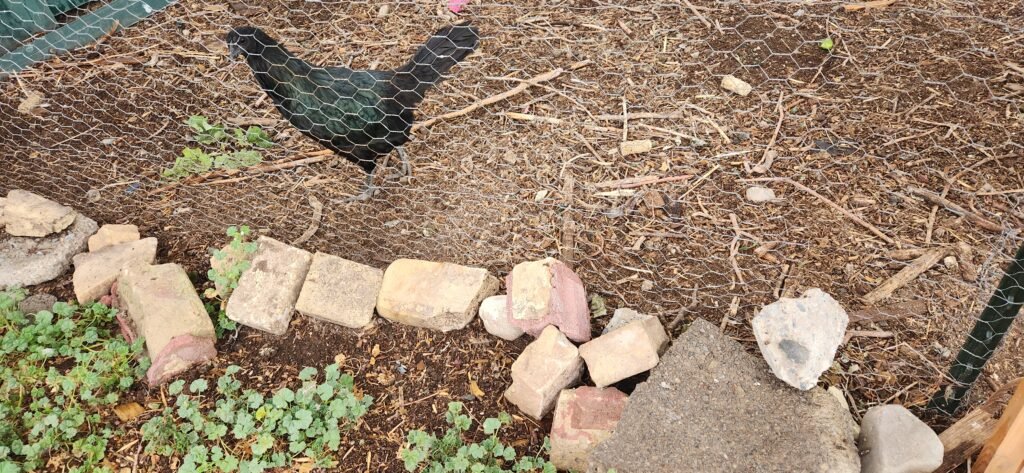
Next, you want to ensure that you use chicken wire or hardware cloth for fencing. Any holes bigger than 1-inch will allow mink into your coop or run. Check areas around doors, windows, and where fencing meets. Close up any larger holes in your coop walls, as well.
The roof of your coop should be weatherproof, giving your chickens a place to escape wind, rain, and other weather. This should prevent predators from coming in, too. However, a run may or may not be protected by a roof. Our layer run is open on the top, but is covered by trees, making it difficult for a hawk to get to our chickens. Our meat pen coop is covered with chicken wire. Many people drape netting over the top or build a shade-type roof to protect from hawks and weather.
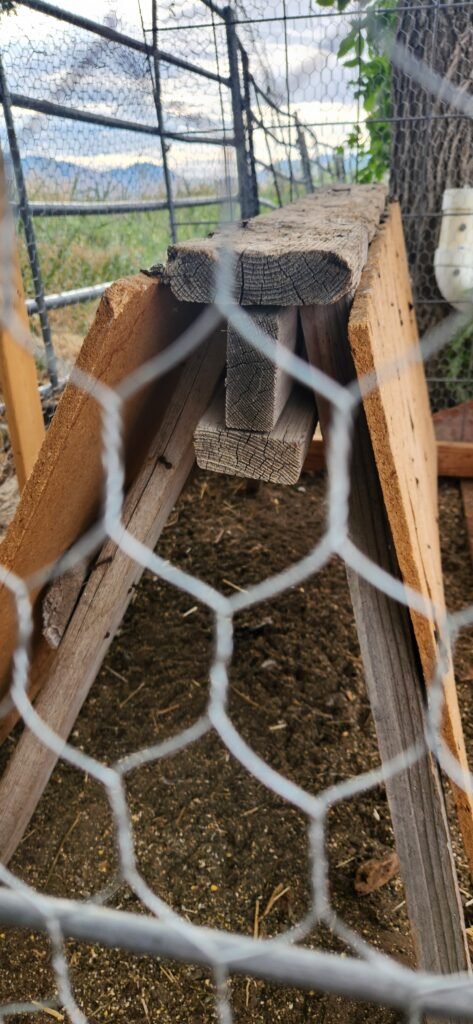
The pasture, however, is a problem area. To prevent hawk attacks, we used spare sawhorses (we use them a lot) as chicken shelters. On each side of the sawhorse, we screwed a piece of plywood, creating makeshift hiding areas where our chickens fit but hawks can’t fly into. When our rooster sees a hawk, he warns the flock, who then run to the coop or nearest shelter for safety.
Many natural predators are nocturnal. Closing your coop up at night is really the most effective way to protect your chickens. We have trained our chickens to come in every night so we can close them up. To do this, we simply chose a command word (in our case, Accio-yes, we are Harry Potter nerds) and call it as we add treats to the run. Within a few weeks, they all know what that command means. Once everyone is in the run, we close both the coop and run, leaving their door open to access the coop. Chickens naturally roost at night, putting them our of reach of many predators.
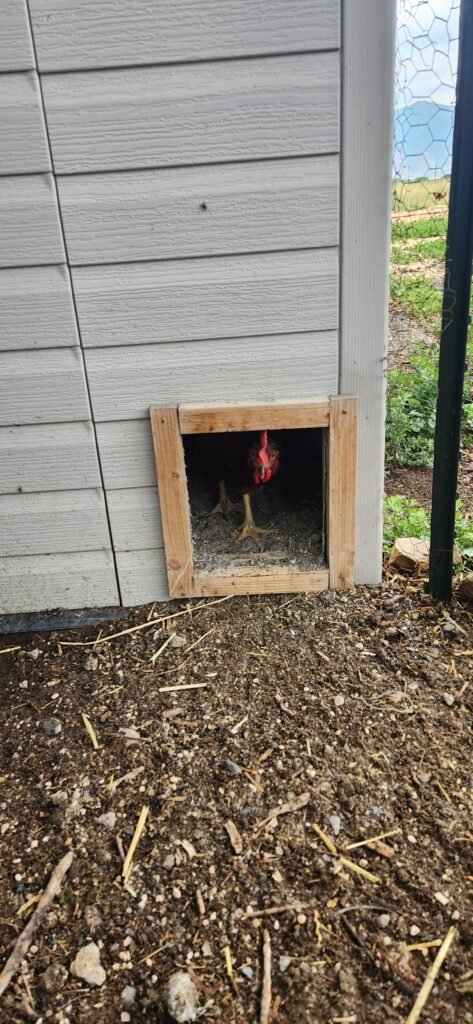
Finally, adding motion-sensor lights is a game changer. We recently had a skunk attack our chickens and added some cheap lights to the outside of our coop. When the lights come one, predators don’t stick around.
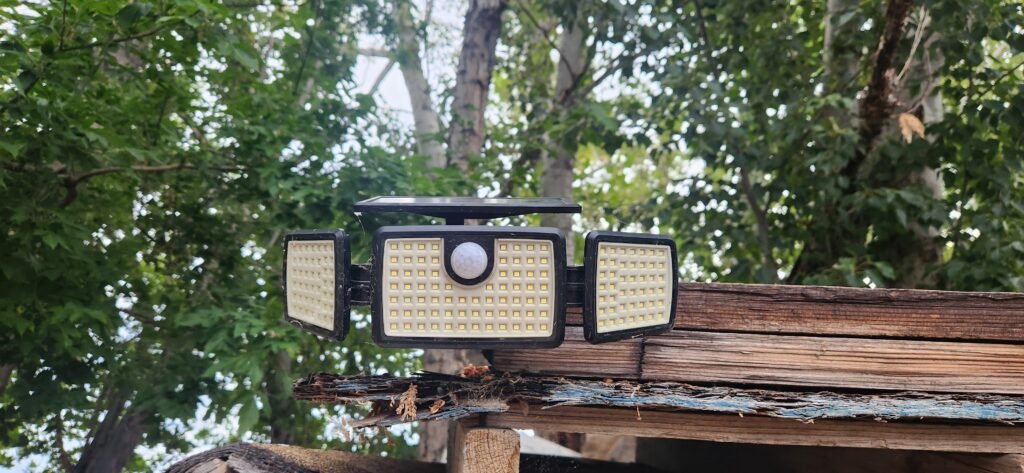
Predator-proofing is an arms race. Even if you do your best, there will be lost battles and, sometimes, lives. While it is devastating to lose a chicken, you have to learn from it to protect those that survived. If you do suffer an attack, try to figure out what animal it was, how it got in, and what you can do to better protect your flock.
4. Nesting boxes
If you are raising any chicken other than Cornish crosses, you will need nesting boxes. While online recommendations are that you have one nesting box for every 3-5 hens, we’ve found that having one box for every 2 hens increases the likelihood that your hens will actually lay in them.
Chickens lay eggs where they feel safe. The area should be quiet, comfortable, and slightly dark. Mother hens naturally want to put their eggs in an area where they won’t be disturbed, increasing the chances of hatching and survival.
If you are collecting eggs daily, you want your nesting boxes to be easy to access and clean.
Most ready-made coops come with nesting boxes built in. Some are simply dividers in a larger space with a hinged top. Others allow the eggs to roll out after the hen lays. All of these types work.
However, since our coops are not typical coops, we’ve had to build our own nesting boxes. After a lot of trial and error- and a low budget- we’ve found that cube organizers are best for us. Thirty bucks at Walmart (or less on Marketplace) and you have six ready-made nesting boxes. A smaller coop may not have the space for this, but for larger areas you really can’t beat it. We simply put it together, add some straw, and put it in the coop. For smaller spaces recycled items like milk crates, old tires cut in half and hung on the coop wall, five-gallon buckets, old dresser drawers, or litter boxes in a wooden frame work great.
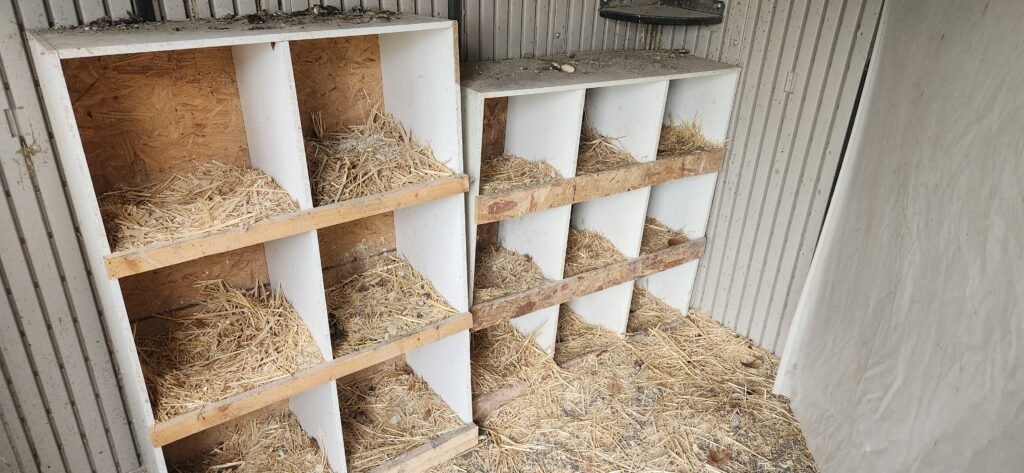
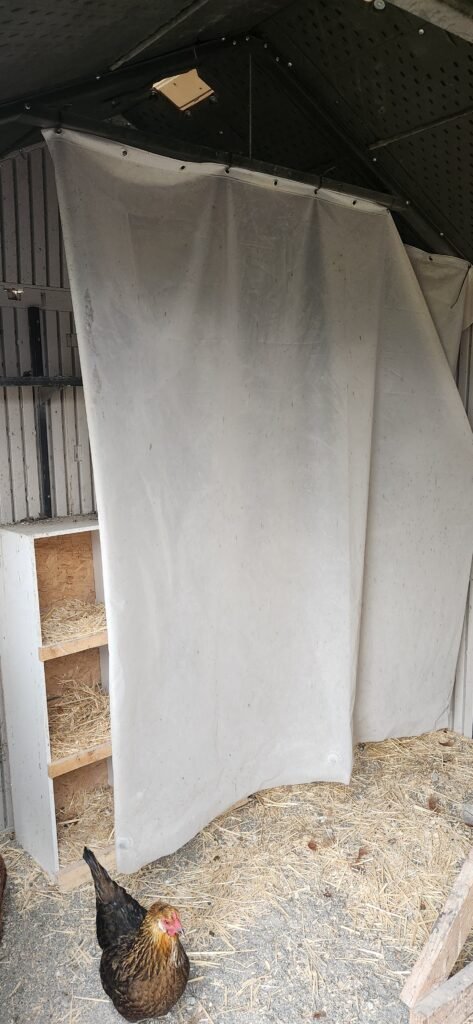
Nesting boxes should be comfortable for your hens, have soft bedding (e.g. straw, wood chips), and be placed in a darker corner of the coop. We found that hanging a Dollar Tree shower curtain in front of our nesting boxes increased egg production by giving our hens a feeling of privacy.
5. Roost
At night most chickens naturally roost. This protects them from nocturnal predators by putting them out of reach. For most layers, roosts should be 2-3 inches wide and have 8-12 inches of length per chicken.
Most ready-made coops come with roosts. However, you will want to ensure there is enough space for your number of chickens and add more if needed.
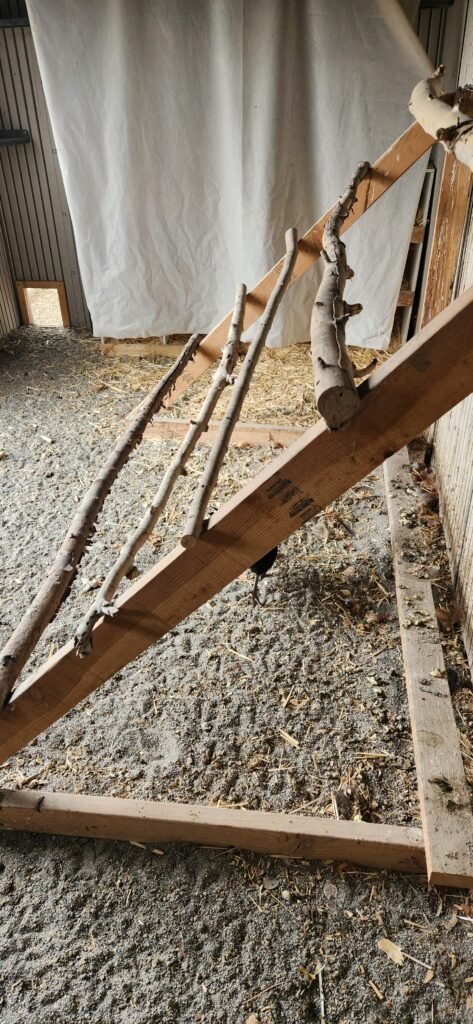
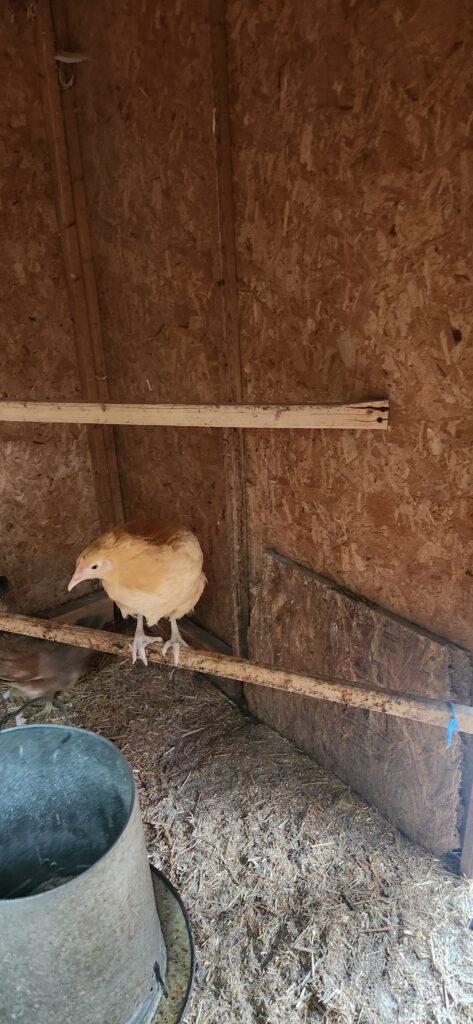
Roosts may be a single piece of wood that spans the chicken coop, several shorter pieces that are attached to a frame, or a random assortment throughout the coop. They should be 18-36 inches off the ground to properly protect your chickens and help them feel safe. A slanted-frame with several roosts attached to the side of the frame, each lower and in front of the other, is very common. Scrap wood, wood wrapped in twine, or thick branches from trees all provide a good roost.
Our chickens enjoy a combination of roost, and love to find their own in the rafters and shelves of their coop.
6. Bedding
Like anyone, chickens want to feel cozy in their home. While the run can be just a dirt floor, the coop should include some type of bedding. In cold temperatures, bedding on the floor can help with insulation. In all weather, it can make cleaning easier. Additionally, soft bedding should be added to nesting boxes to give hens a soft place to lay. There are several options for bedding.
Sand

Our layer coop floor is covered in construction sand about 3 inches deep. Rodents don’t like sand, so they stay out of the coop. Sand is easy to clean with a sifter fork and stays cool in warm weather. It provides insulation in winter and gives the chickens a natural dirt bath, which helps with external parasites. Our sand came from a landscape supply company in truckfuls and will last several years. Sand doesn’t hold moisture, which keeps the coop dry and reduces odors. If you choose sand, be sure to get a big enough grit that dust is kept to a minimum, as it can cause respiratory issues.
Wood Chips
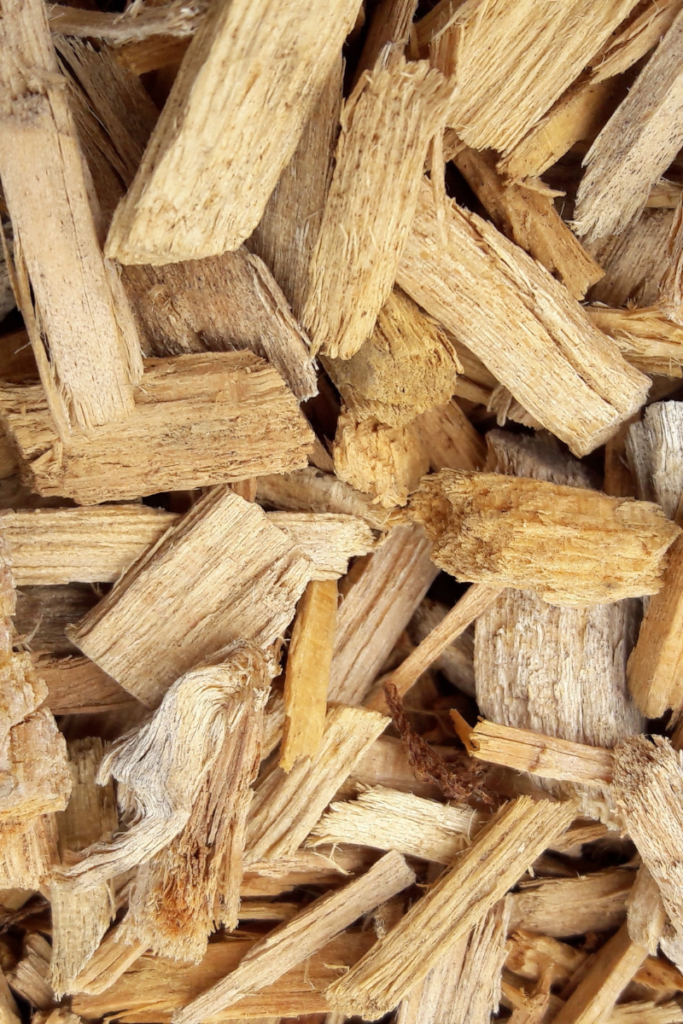
For a long time, wood chips were our choice for bedding on both the coop floor and in the nesting boxes. They are soft, warm, and comfortable. The pine scent repels some parasites, as well.
Wood chips should be pine (not cedar). They should be changed whenever they are wet or start to have a bad odor. We opted out of woodchips when we ended up cleaning our big coop out every other week, making buying woodchips a big expense. In the winter, woodchips held moisture and would get mushy and cold if they weren’t changed often enough. Mice also loved the comfort, making our coop a refuge for rodents.
However, we still use woodchips in nesting boxes and in our baby brooder. They provide the comfort and warmth both layers and chicks need, and using them in smaller areas cuts down on cleaning time and cost.
Straw
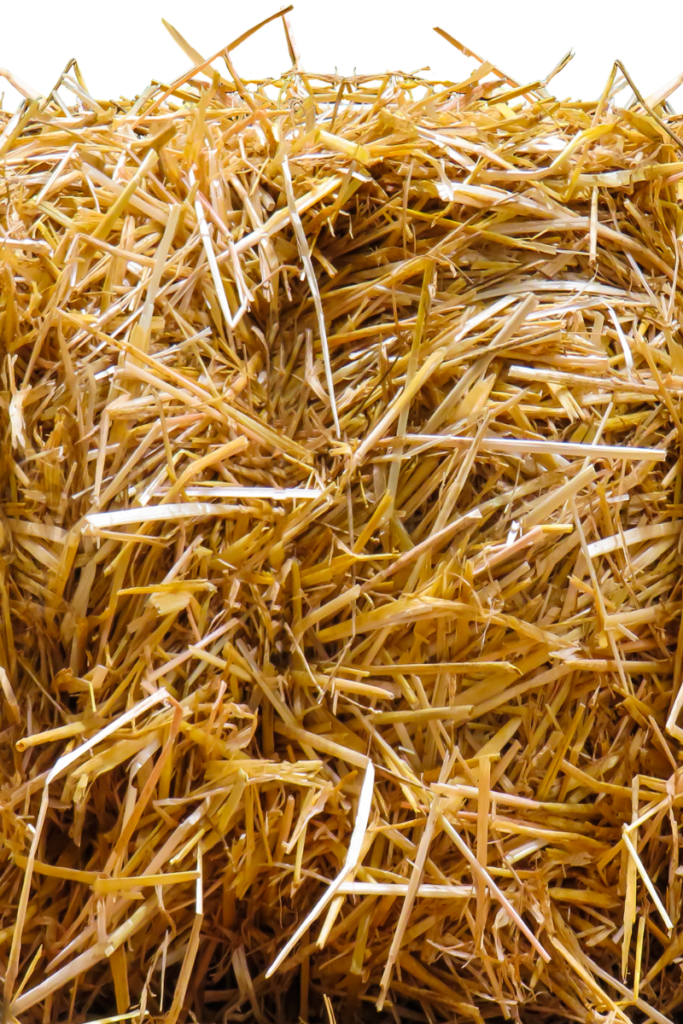
Like woodchips, straw needs to be changed on a regular basis. However, as we live surrounded by wheat fields, it is something we can get at a cheaper price. In the winter, our meat birds floor, all our nesting boxes, and our brooder have straw rather than wood chips if its available.
7. Feeders
There are a ton of different chicken feeders on the market and, unfortunately, I can’t tell you what will work best for your chickens. In fact, we use different feeders for different chickens. Feeders keep feed fresh, away from pests, and protect your chickens from internal parasites that may be on the ground.
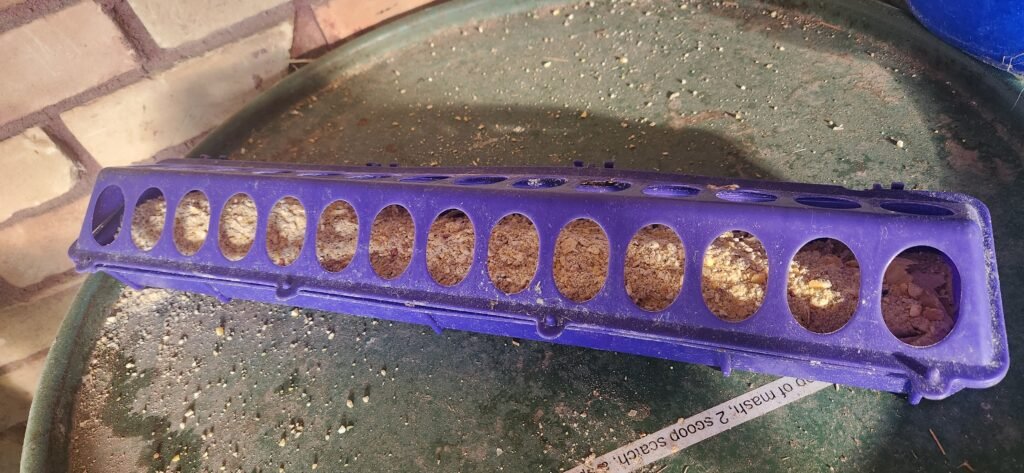
For our brooder, babies are fed with a long feeder that has a lid with holes cut out. This helps them reach food easily, but prevents them from scratching it all out. As they are small and they don’t need much feed, filling this once a day works for us.
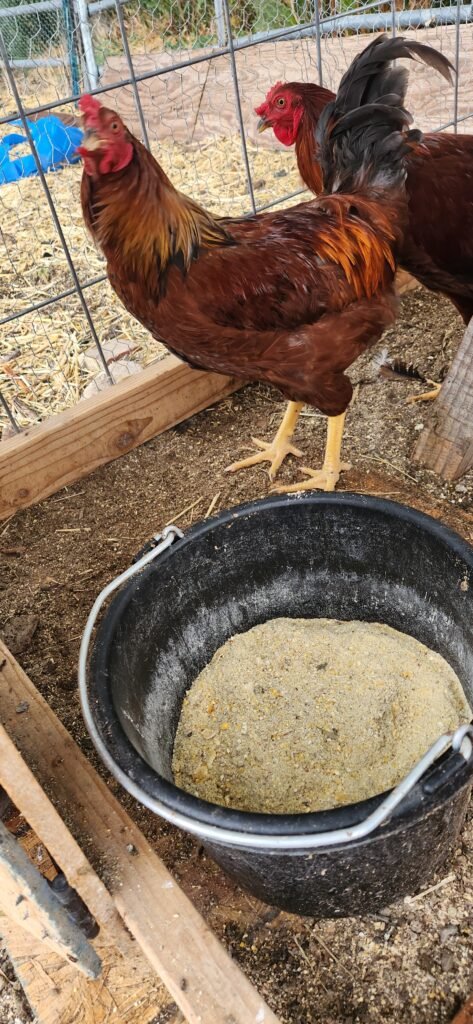
In our chicken tractor, which is portable, we simply put feed in a shallow bucket or pan feeder and let them eat. This allows us to adjust feed amounts, move things around, and adjust to different sizes of chickens.
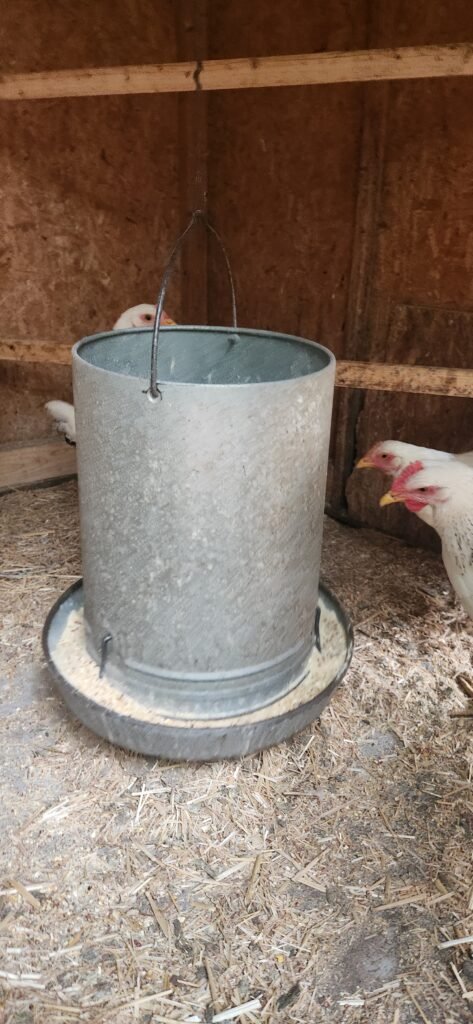
Our coops all have hanging metal feeders. While these are not my favorite, they are working well for our current flocks. These feeders should be hung from the ceiling (or an old porch swing frame), which prevents pest access and chicken scratching. The height can be adjusted to your chickens as they grow.
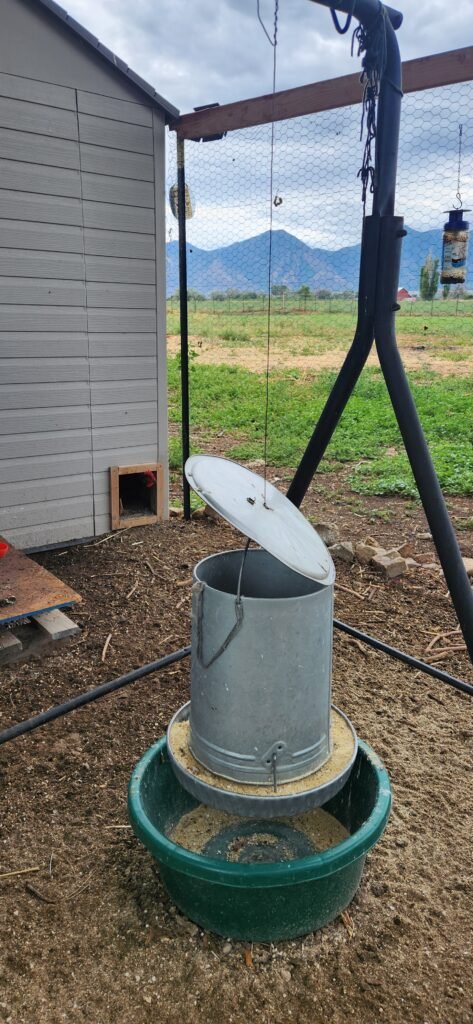
We placed a large horse feeder under our feeders to catch any food that does fall. We simply pour it back into the feeder every few days. On our outdoor feeders, we provide a covered shade to protect them from rain and snow.
Finally, some people swear by the PVC feeders that store feed in a bucket or bin and force chickens to put their heads inside the PVC to get food. This supposedly reduces feed waste, scratching, and pests. I don’t have experience with these, but they are an option.
8. Waterers
If there was one single item that was most important for the health of your chickens- this would be it. Water is essential and you want to make it as appetizing as possible to encourage proper hydration. However, like feeders, what works for your chickens will vary based on their preferences.
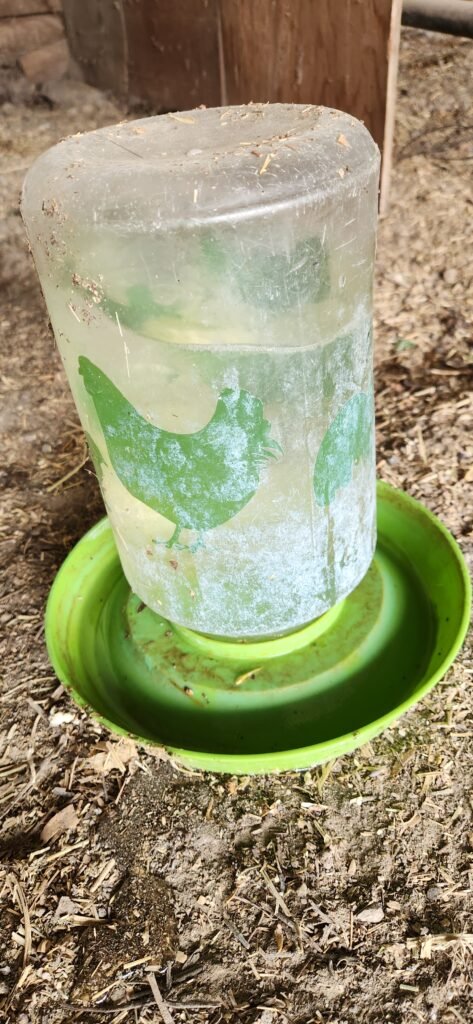
For babies, chick waterers should be used. Chicks can quickly drown in any large amounts of water. We use a water base that attaches to a mason jar and scrub it clean every week.
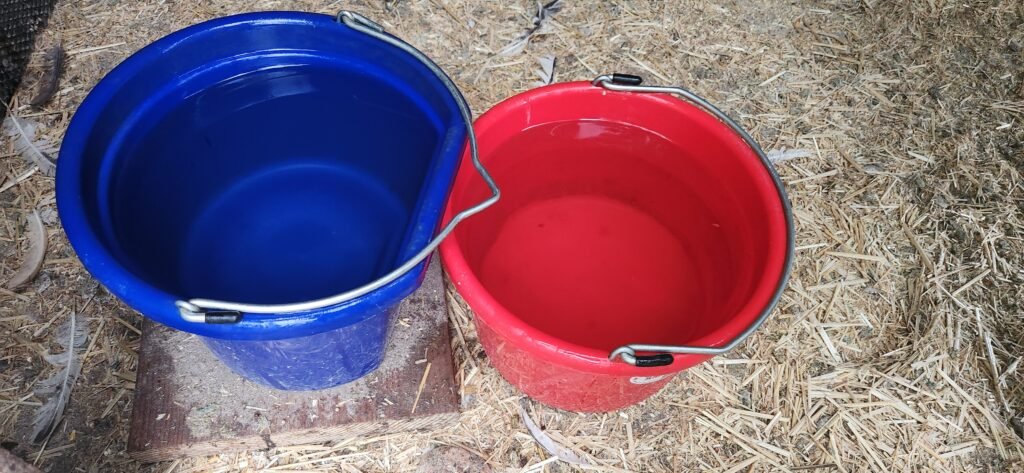
Our meat chickens and chicken tractor simply have a couple of water buckets, like those used to feed horses. They are big enough to reach the water and won’t drown if they fall in. This provides a large amount of water. Buckets are cleaned almost everyday and refilled with fresh, cold water.
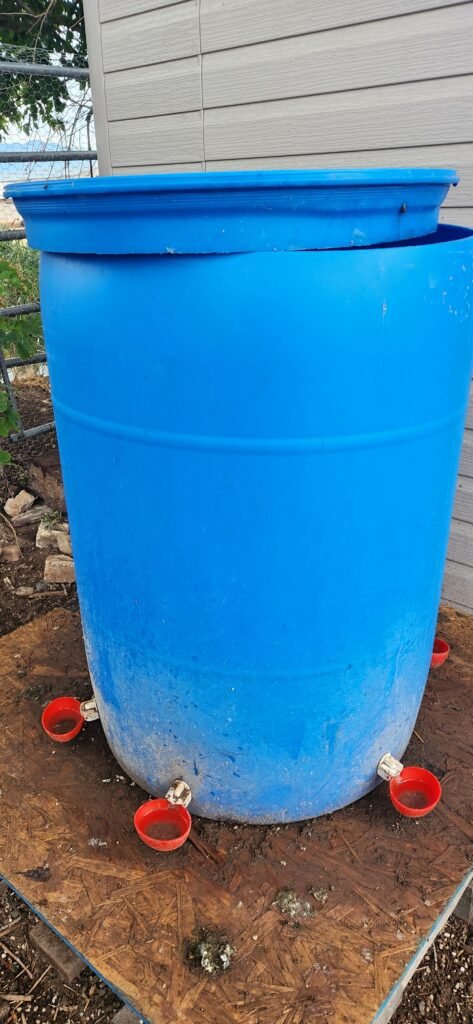
In the summer, our layers have a 55-gallon bucket that has automatic cups around the bottom. When a chicken drinks from the cups, the load lightens and a spring pushes the cup upwards. This opens a valve between the barrel and the cup, allowing it to refill. When the cup is full, gravity pulls it down and closes the valve. This is refilled about once a week and scrubbed clean about once a month to prevent algae. These cups can be purchased at most feed stores and can be attached to smaller buckets or containers ro make them more portable.
In the winter, everything here freezes, including our waters. To ensure that everyone has drinkable water, we do a few different things. For our coops with access to electricity, we add heat lamps above the water or water heaters inside the waterers. Be sure to observe all safety concerns and follow the instruction manuals carefully. Heat lamps should always be attached two different ways so they don’t fall and start a fire.

For those who don’t have electricity, we take a couple water bottles, add about 3-4 Tbsp. of salt water to them, shake, seal, and drop the sealed bottle into water buckets. This way the salt water doesn’t contaminated the fresh drinking water, but waters have a higher freeze point because of the salt. Additionally, waterers may be moved inside the coop, wrapped in bubble wrap, emergency blankets, or reflective window coverings for insulation. Regardless, waters should be checked throughout the day to ensure that they haven’t frozen over and your chickens have access to fresh water constantly.
9. Feed

The feed you give your chickens will depend on the breed, purpose, and age of your chickens, as well as the weather around them and the foraging opproutinies they have.
Chicks
Babies from 0-6 weeks old should be given a starter feed. This feed has a high (18-20% protein content) and is often medicated to protect chicks from disease. This should be given freely, allowing the chicks to eat whenever they want.
The exception to this is Cornish meat breeds, which should be given a lower-protein feed to slow growth and only be feed for 12 hours in a 24 hour period, starting around 2-3 weeks of age and continuing until 24-48 hours before processing, at which point you remove food altogether.
Growers
From 16-18 weeks, your chickens are considered growers. They can be switched to a feed that is 15-17% protein and allowed to forage in safe places. This may be a crumble or a loose-form feed. We are lucky enough to have a local mill that processes feed daily and provides our chickens with fresh mash that is also suitable for layers. At this point, we allow our chickens out into the pasture to find plants and bugs, but also offer full feeders throughout the day.
Layers
After 18 weeks, your chickens are considered layers. Layers need a 16-18% protein feed that also includes calcium. This means giving them a layer crumble or mash, or adding a calcium supplement (see below) to their feed. Egg creation takes a lot of calcium from your hens’ bodies, which, if not replaced can cause a deficiency and health problems.
Chickens will also naturally forage for bugs, plants, seeds, and other foods. At this age, they can safely be fed treats like squash, cucumbers, pumpkins, melons, breads, dried meal worms, and scratch.
10. Supplements
Grit
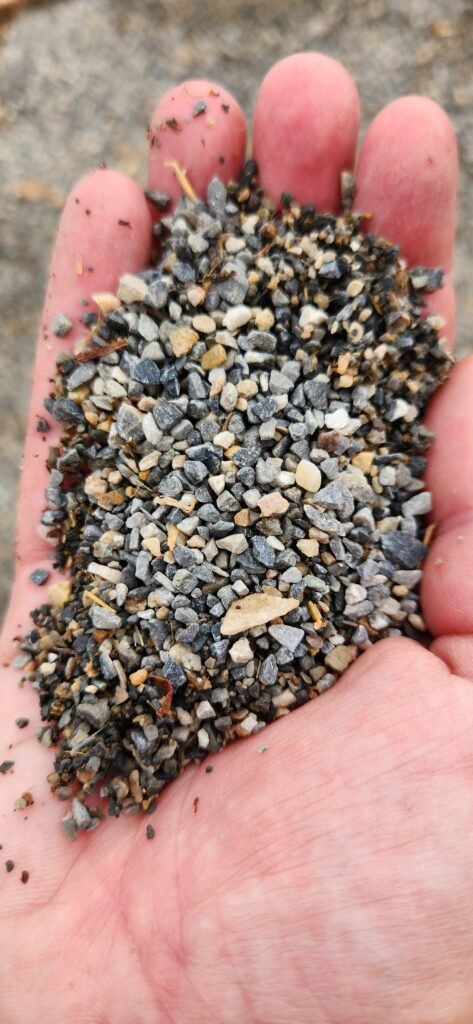
Chickens do not have teeth to break up their food, so it is essential that you provide grit as a part of their normal diet. They will eat grit as needed, which with enter the gizzard along with the food they eat. In the gizzard, the grit will crush and break apart the food for digestion. Grit is essential for every chicken after the age of two weeks and should be fed in a bowl or dish separate from feed which is made available at all times. Small chicks will need a smaller-grain grit, which is available at many feed stores.
The only exception to this, is free-range chickens. These chickens do not need to be given grit as they naturally pick it up from the ground around them. However, this is only okay if they have a lot of foraging space, and most homesteading chickens should still be supplemented.
Oystershell
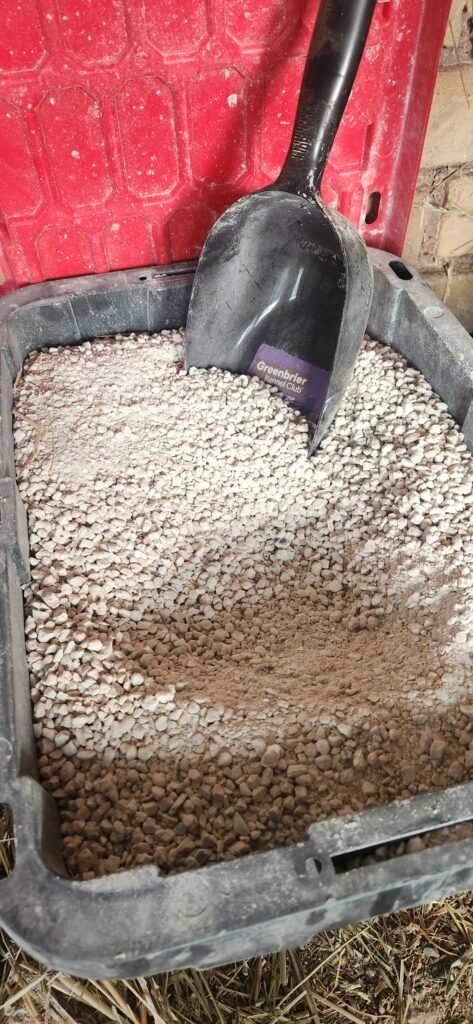
Laying hens need a lot of calcium to grow and lay eggs. The process drains calcium from their body to form the eggshell. Layers who are deficient in calcium will create eggs that have odd shapes, wavy shells, or soft shells. They can become egg-bound, or unable to lay eggs that are too soft, which can lead to infection and death.
Supplementing chickens with oystershell can increase their calcium levels and help them lay stronger-shelled eggs. Available at most feed stores, oystershell can be fed in a separate bowl and offered constantly to your chickens. They will eat it when they need more calcium.
3. Deworming
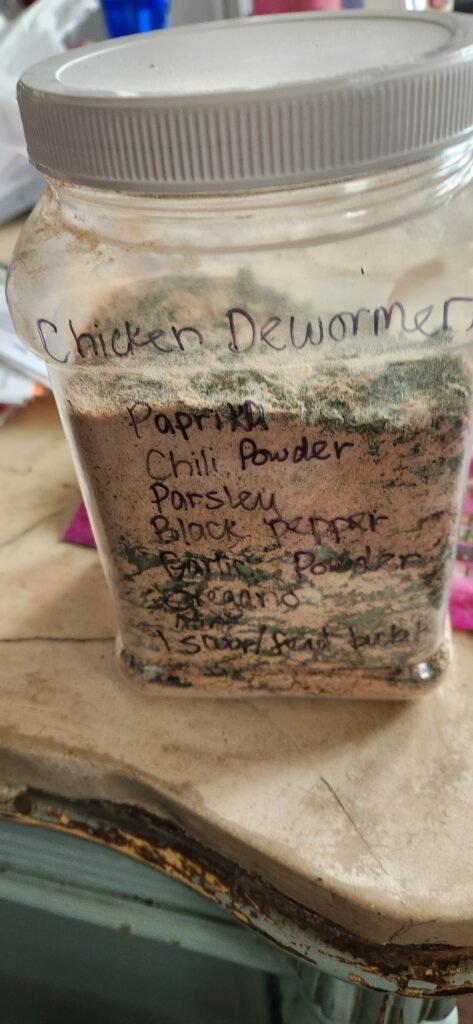
Finally, while many people don’t believe chickens need to be dewormed on a regular basis, I have found that providing a natural dewormer with feed protects our flock’s health. Chickens often eat off the ground and can pick up internal parasites that can cause health issues like malnutrition, anemia, egg laying difficulties, and make them more susceptible to other illnesses. While medical dewormers exist, and should be used if your chickens show symptoms of parasites, our flock is fed a simple mixture of spices to help keep the pest load in their guts low.
While there are many recipes available, we have found that a mixture of paprika, chili powder, parsley, black pepper, garlic powder, oregano, and mint, added at the rate of one teaspoon per feeder-full of feed has reduced stress and health issues in our flock. The spicy flavors also deter pests from eating the food. However, chickens cannot taste spicy, and are undeterred when it is added to their food.
Final Notes
I have been raising chickens for almost 27 years now, and I’ve come to love watching out little flock. Chickens are an easy, low-maintenance way to start growing food (eggs, meat, or both) for your family at home. The cost is relatively low and, while you likely won’t be getting your eggs for $1/dozen, they will be healthier, fresher, and tastier than the ones from the store. With a few basic supplies, and a lot of love, your new pets will be pooping out breakfast by the time they are 18 weeks(ish) old.
Want to learn more homesteading skills? Check out my homesteading blogs here for information about raising animals, gardening, and more!